Devlog 1. Water system 1/3: replacing current currents!
Hi! Gleb here.
The public demo. This is the next step after the jam version - a prototype I developed only in 3 days. This demo should have new features (like coop mod), and several improvements of existing ones. Probably the most important thing in a game about white watering (kayaking, etc.) is… Water! So, let’s start improving it.
Redesigning currents system
The current system of currents (I really like this play of words) is based on boxes. Boxes contain information about direction (the arrow inside), and the force - that is easy. But it’s not easy to place squared rectangles along the curved river - that is the main reason for the infamous “The Rock”. Also, it’s very hard to do small elements, e.g. how currents go around rocks. In the jam-version each rock has a boxed current that is supposed to push you off the rock… and it was misplaced for “The Rock”. So, not an ideal system at all.
What I want is a system that is both easy to use (to create new streams and currents), that is easily readable (the direction and the force), and that creates more realistic currents - with gradients of force, etc.
The currents in rapids are usually drawn with arrows. Here some examples from books for rafting/kayaking (I prefer to call it “white-watering”):
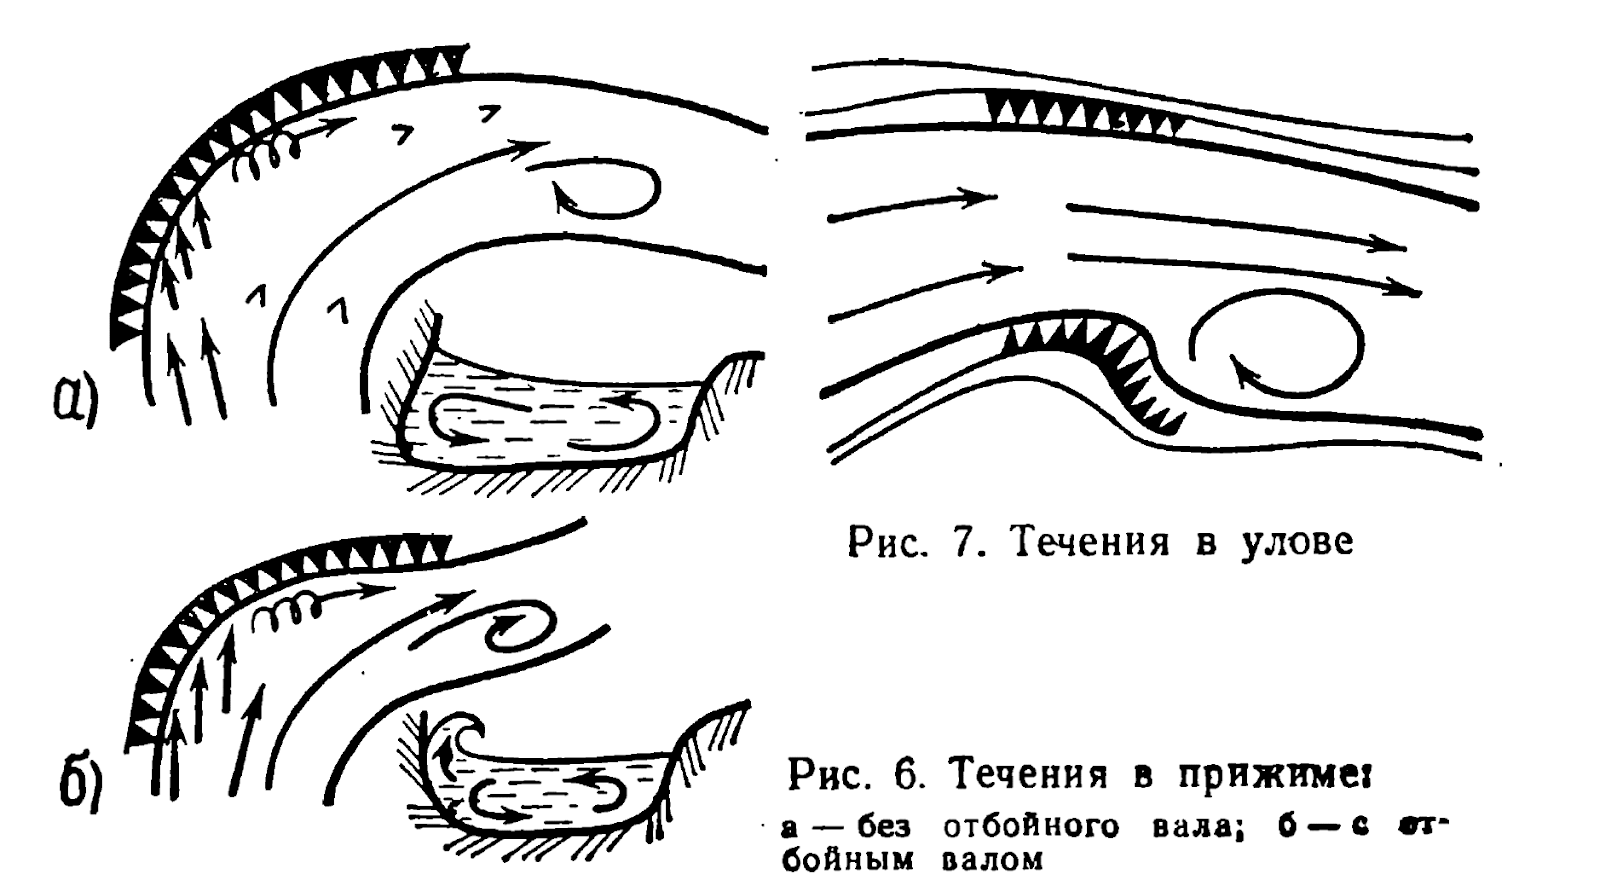
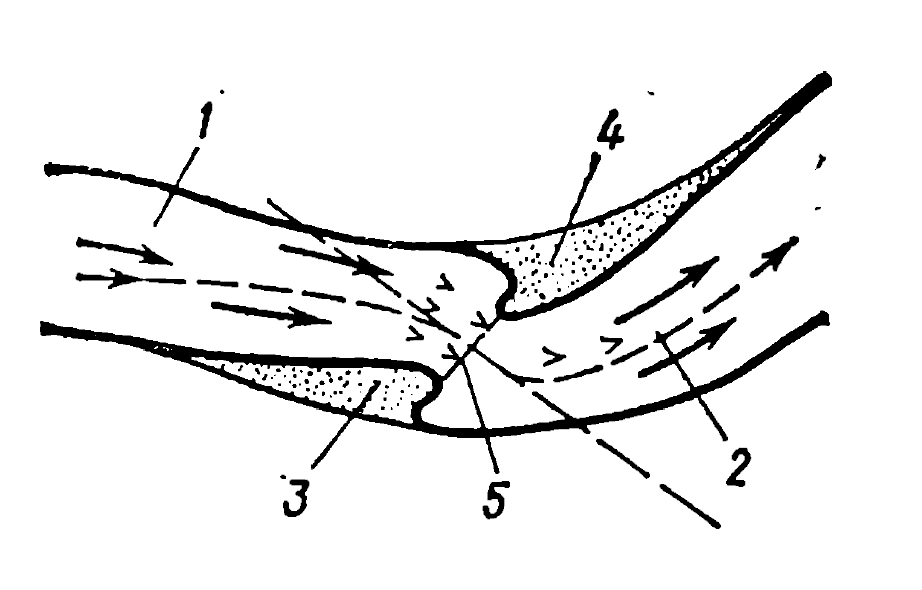
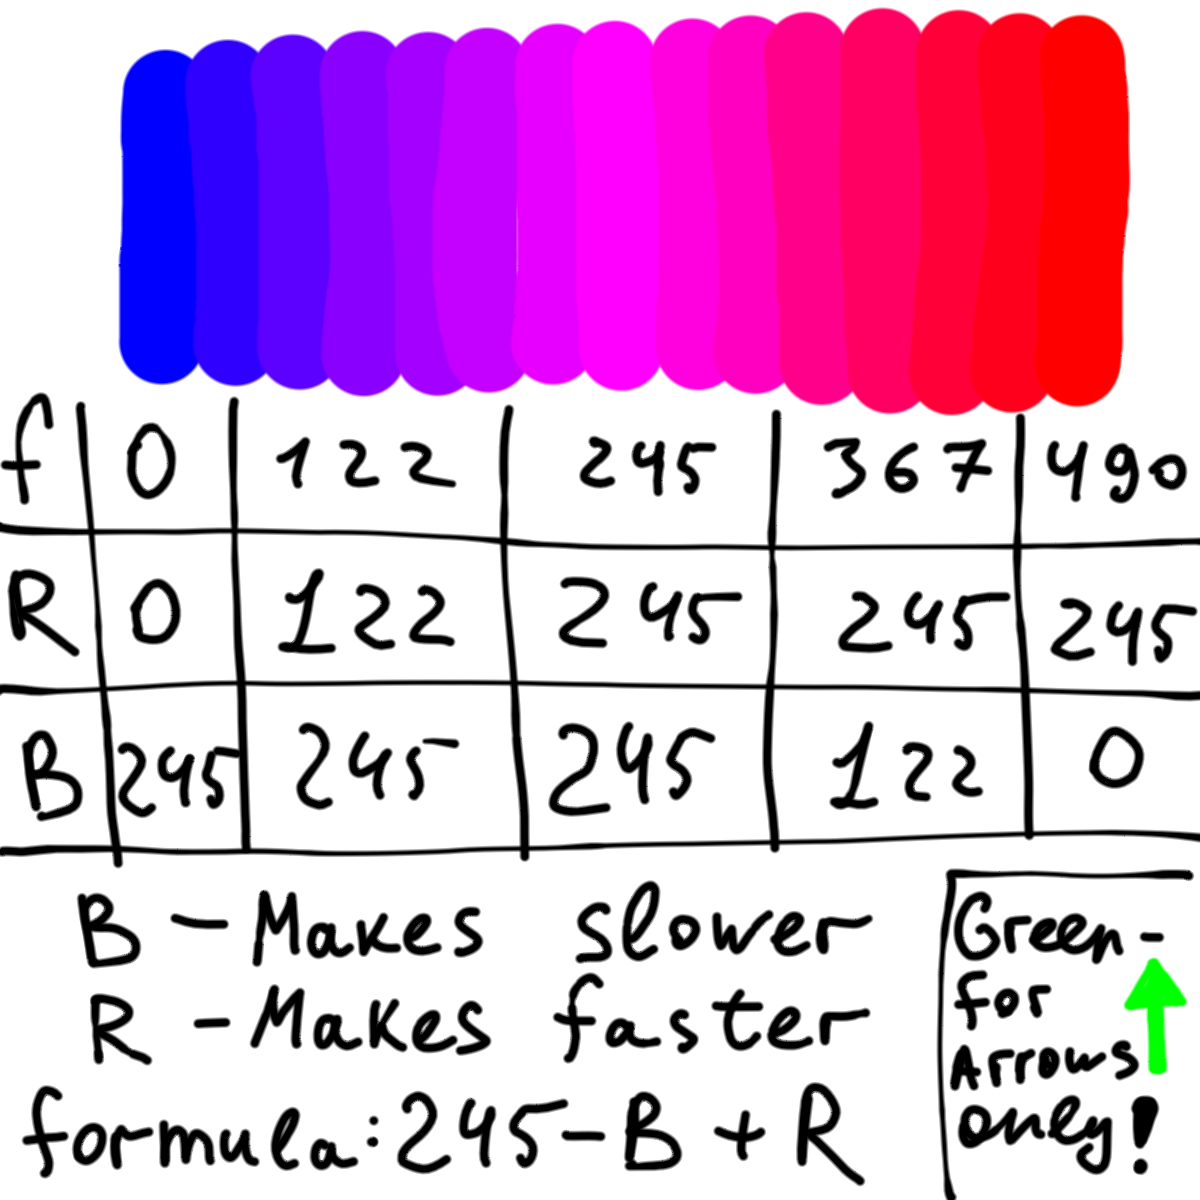
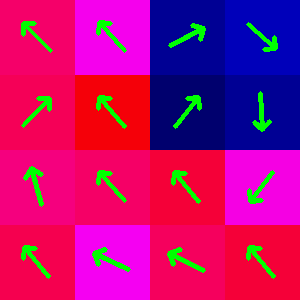
And we will do it even better! I will use the same arrow-like indication, but also we will add proper force indication with colors. Let’s call blue slow color, and red - fast. Mix them (to pink), and you will get a middle-like force. So, now the river can be just drawn like a map, no need to place cubes all around.
How to implement it
But let’s talk about how I will implement that in the game. How will the game read this hand-drawn map in real-time? Well, it will not! I came out with a more optimal solution - we will pre-calculate the forces at every coordinate, so it should run very smoothly. As an addition, we can also improve the map - bring it to a standardised look. Also for now I decided to keep all forces on a grid - so the whole map will consist of small squares. So, here is the hand-drawn map, next to an improved version generated by my script!
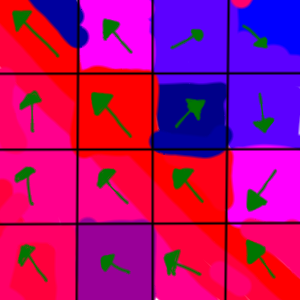
The colors and arrows are generated after calculating direction and force. Ofc all values (coordinate, angle and force) are also saved as text, for Unity to import them later.
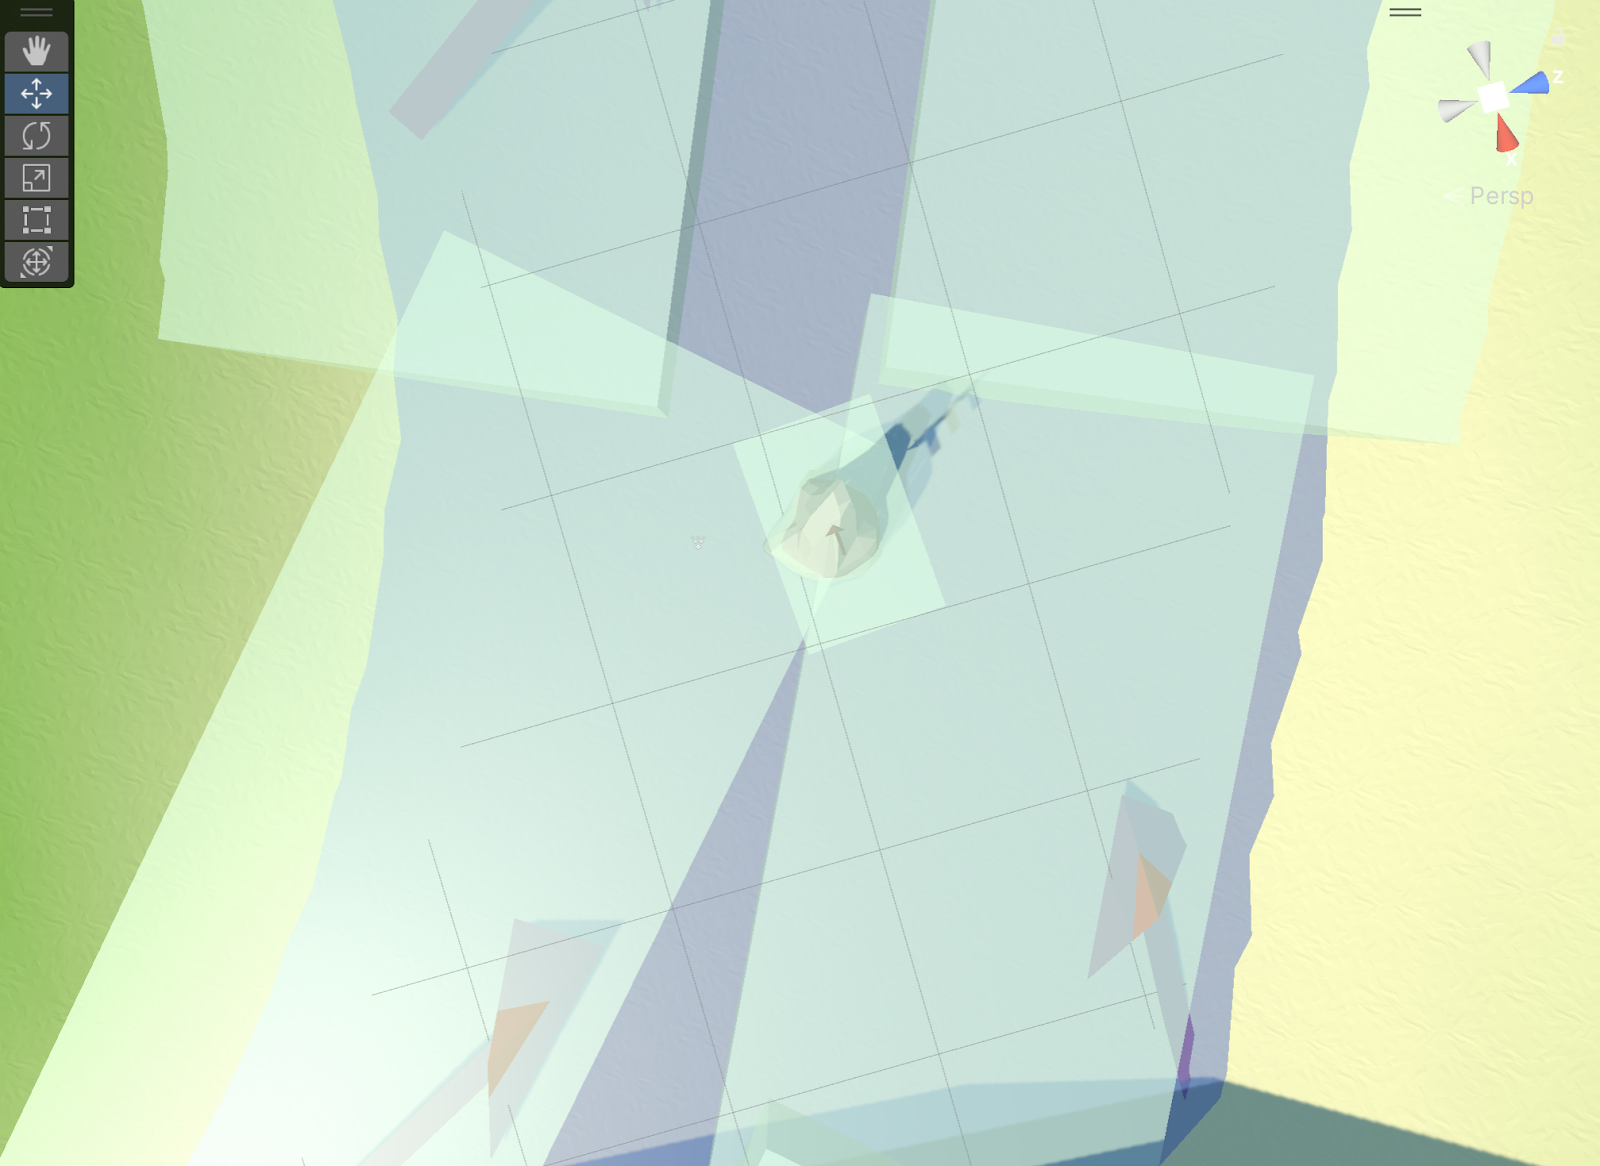
But, you can say that it’s crazy to hand-draw arrows in each cell… And you would be totally right! That’s why I need to continue and create a script that will also read long hand-drawn curved arrows, like in the picture below:
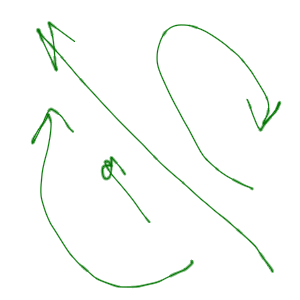
For convenience I decided to work with long arrows on just a transparent background - so we will need to adjust the values for each cell and add bg colors indicating force (and run the first script).
This task turned out to be way more complicated than the first detection…
About Python and ChatGPT
By the way, the scripts I wrote in Python - it’s fun when you know many languages and can choose what is better for the task. Python allows very easy prototype things, and also usually has more libraries (but maybe it’s also a matter of taste). And also, since the jam is over and I have fewer restrictions on using generative AI, I tried to use ChatGPT to prototype code faster… And I remembered why I don’t like using ChatGPT - he is REALLY stupid. Actually, I found that for programming he works not like generative AI, but more like an express search engine for StackOverflow, that on top can only change var names. For the first part (when we already have arrows in each cell of the grid) it helped more - I described each function that I wanted and then needed to do minor adjustments (like mask selection, calculating the centre of mass, etc.). But still, I had to design the whole structure of the script, so ChatGPT actually worked as a junior programmer for me - he was following my design, and applying adjustments that I found were needed. And still, the quality of code I would politely call "not ideal" For the second algorithm, which works with the “raw” (long and curved) arrows he failed. So I used it like Google - “how to change color of image”, “Iterate np array using only 1 loop”, “convert image to grayscale”, etc.
So obviously there is just no solution on the internet - that’s why it can’t “generate” anything. I also searched the internet myself and found only one solution on how to treat long curved objects to detect midline (basically it’s the main step on dividing an arrow) - a solution on how to fit a Polynomial curve inside edges of detected objects (e.g. banana). But, it limits the number of turns that an arrow can have (as all parametric functions do). And for rivers, we want to be able to draw very curvy arrows. So, no shortcuts on this task - need to program it myself.
Second script - analysing curved arrows
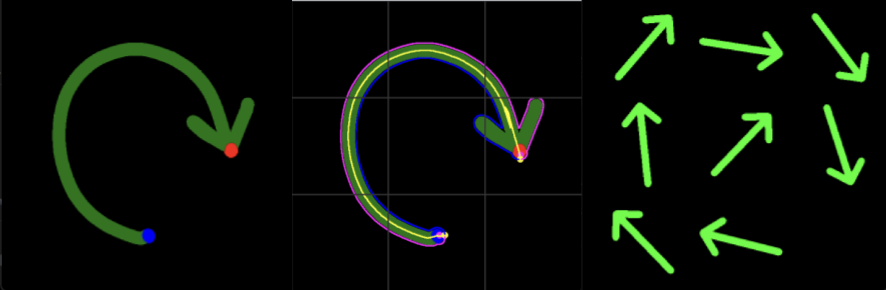
For now, let’s focus on how to analyse one arrow: we need to detect its direction, the middle line (the line is probably curved), and generate little arrows, according to our grid size. Smth like this:

Scheme what I need from the second script
For testing, I made a set of arrows, so I know my script works with all of them:
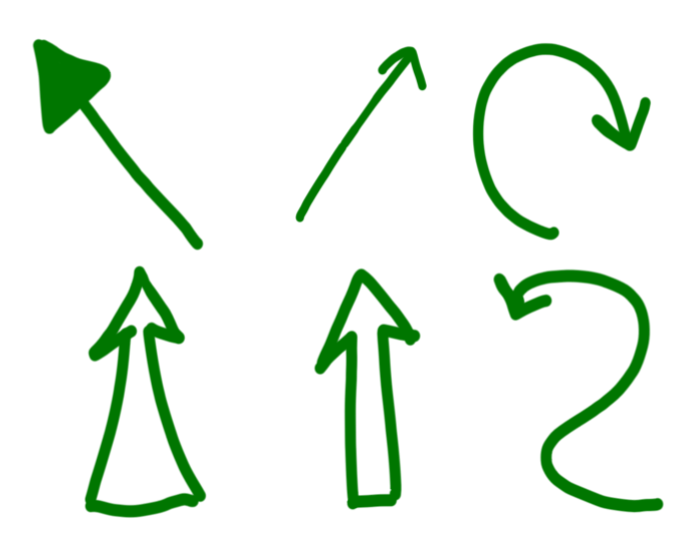
The detection of the arrow tip and end of the tail by shape of contour almost worked out, but it was unstable (it randomly failed to detect, or detect other parts as a tip) and also didn’t work for wide skeleton arrows (and they are handy). So for now the tip I am marking with a red dot, and the end with a blue point. Also, the arrows should be closed - it means that all lines of the arrow should be connected (but it can have a hole in the centre). The color of the arrows should be greenesh - as for now the tip and the end are red and blue dots.

The solution that I found is the following:
- Detect arrow shape (get mask)
- Get the location of the tip and tail (for now, by color dot)
- Get edges and split them to left and right
- Now, we are calculating the middle line by going tail-head and getting the middle point between borders
- With the middle line, the rest is simple - for each cell find the start and end of this line, and now we know the direction of the cell. For cells that are covered by the mask, but where the middle line is far away to get direction, we need to extrapolate values from other cells.
Now the last step, let’s allow the script to detect multiple arrows, and merge direction if needed.
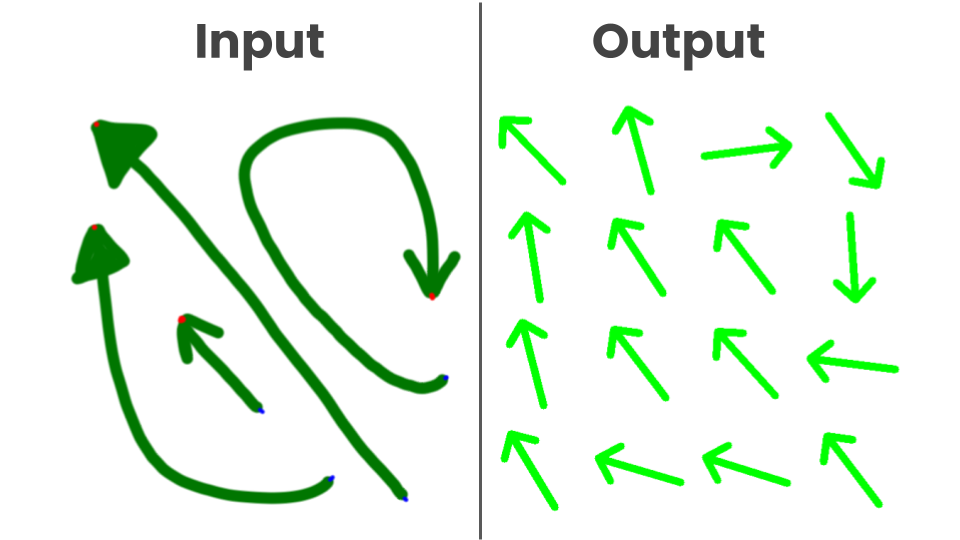
The script is done! Now I can just draw the lines by hand - easy-peasy! Or not so easy. But anyway - don’t try to fix what is not broken, and this tool seems to work.
Seems to work well! Maybe not the perfect code, but anyway I will execute it only once and will be able to manually validate results. Later, if the game will receive support to become a full steam game this script will be part of modding tools - so you will be able to do custom maps, and just simply draw water currents by hand. Also in the case of full release, I will probably polish these scripts (or maybe I will be too lazy for that 😅).
Anyway, let’s continue with the water - the next step is to implement the matrix of directions and forces into the game (and display debug texture properly). Also, I really want to go from flat water to real stages, cascades and waterfalls. But that is for the next stage - stay subscribed! After finishing the water (3/3) and compiling (optimizing) for HTML5 I will publish the demo (and will continue by updating it).
Stay strong!
Leave a comment
Log in with itch.io to leave a comment.